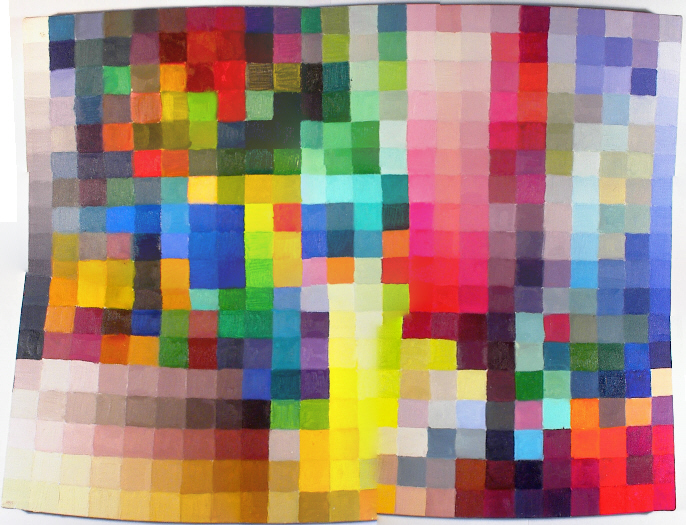
Best-stitched mosaic image, before gamma correction
(ie, nonlinear RGB values)
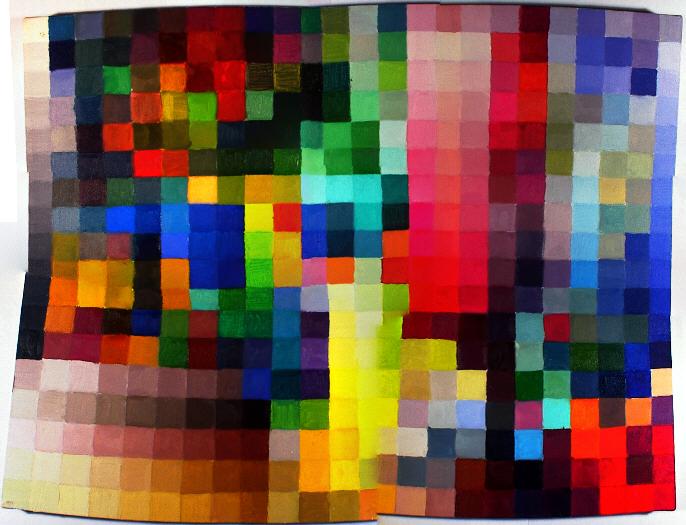
Best-stitched mosaic image, after gamma correction
(ie, linear RGB values)
After stitching together a single high-resolution image of the painting, we still had to apply what we learned from the camera calibration to our image.
Remember that the camera's processor's output was an image with nonlinear RGB values. We wrote a MATLAB function, imagetolinear.m that processes each pixel of an image according to the tolinear.m function we created during camera calibration. Using our choice of best-stitched image (using the panhead/sharp options), we ran this function.
Here is the image, before and after gamma correction:
Best-stitched mosaic image, before gamma correction
(ie, nonlinear RGB values)
Best-stitched mosaic image, after gamma correction
(ie, linear RGB values)
As we expected, the gamma correction for the nonlinear RGB values of the original image resulted in a darker, linear RGB image.
We also wrote functions imagetoxyz.m and imagetolab.m in the event that we might need the image in formats that were not device-dependent. For instance, had we obtained the method for poster printing from the printer calibration group, we would have been able to print out a full-size image using XYZ values for each pixel.